Introduction
Build a Speed Dial Mini from some cardboard, sellotape and a paperclip. Make a button from kitchen foil. Use one of the templates we provide, or decorate your own to create tailored messages that you and your remote companion can exchange.
To begin this step you’ll need to have your Speed Dial breadboard assembly already made (one or two of them depending on whether you are intending to pair them yourself, or pair remotely). You’ll also need to have ready the necessary tools and parts which can be sourced from a range of independent online retailers - click the parts links for more details including tailored options for certain countries.
-
-
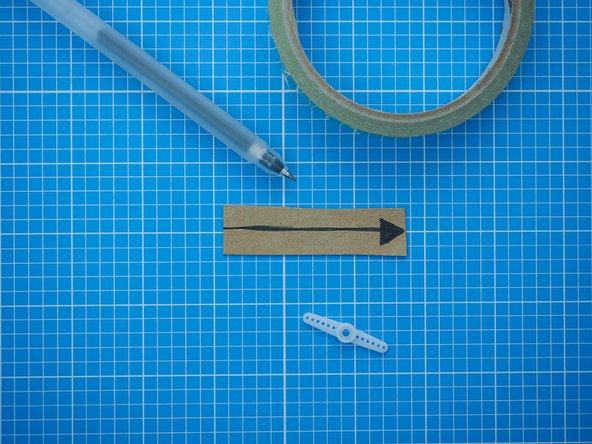
Gather the items from the parts and tools lists.
-
Print page 1 of the 'Speed dial mini paper template' available to download from the parts list. Make sure to print at 100% scale on A4 paper, or use the measurements indicated on the template.
-
Also for optional custom dial and pointer variations print examples from page 2 onwards on coloured paper.
-
-
-
Select a piece of cardboard for the mount and the two legs of the device. Postal boxes or cereal packets work well , or you could try using an A6 sized postcard (148 x 105 mm).
-
Print the page from the PDF paper template containing the mount and legs on A4 paper at 100% scale or use the measurements indicated on the template.
-
Stick the template to the cardboard and cut on the solid lines. Alternatively you can trace it onto the cardboard or take measurements from it.
-
When cutting out the small rectangle first pierce a hole in the centre of the rectangle with a pointed tool such as a pen or the nail scissors. Starting from the hole in the centre, cut out the rectangular shape with the nail scissors.
-
For a sharper cut, gently score the outline and corners of the rectangle with the sharp tip of scissors before cutting.
-
If you're using thicker card, you may need to cut wider slots on the legs and mount.
-
-
-
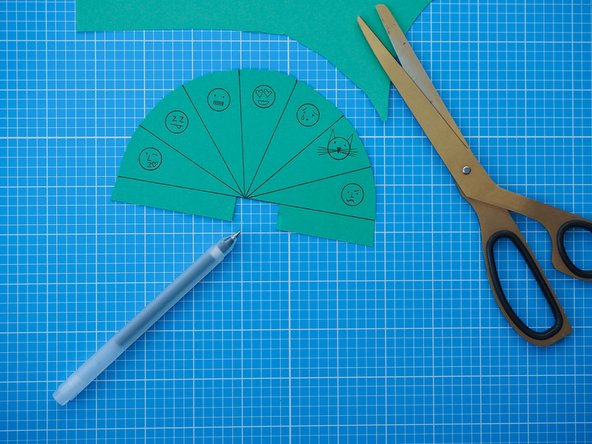
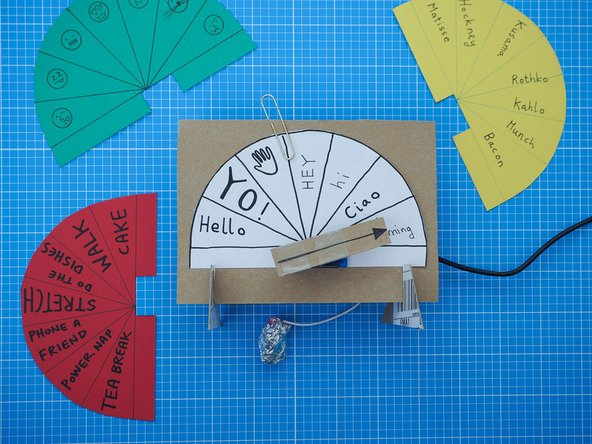
Choose a dial template to use in your device. Use can use ones that we provide or choose a blank one and create your own.
-
Print the dial template directly onto a piece of card or paper. A brightly coloured piece of thin printable card is ideal. Make sure to print at 100% scale on A4 paper.
-
Cut out the dial.
-
If your card is too thick to go in the printer, you can print the dial template on standard printer paper and stick it to your card, or use it as a template to draw on the card itself.
-
If you decide to make your own, there are lots of examples on our website to inspire some interesting dialogues.
-
-
-
Separate the servo motor from the breadboard assembly by unplugging the cables.
-
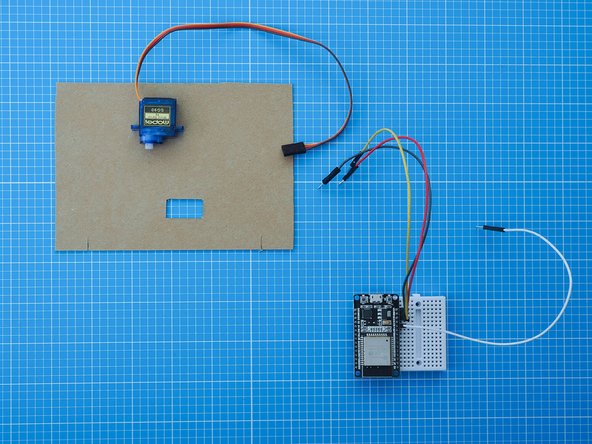
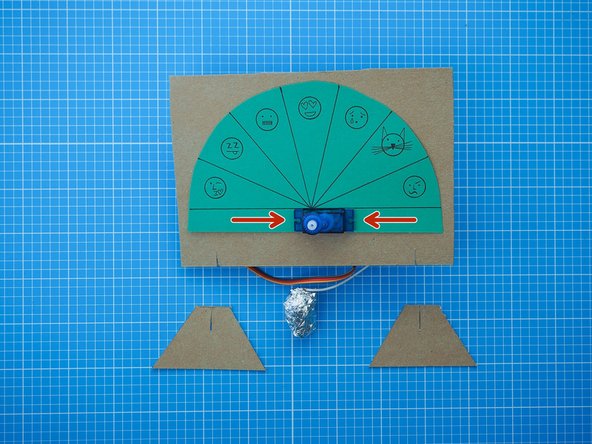
Insert the servo motor through the front of the card mount making sure the servo motor axis is centrally aligned to the mount as shown.
-
You want the fit to be quite tight and you may have to cut your rectangle slightly bigger to get the right fit. It is also a good idea to secure the servo motor in place from behind the mount with some tape.
-
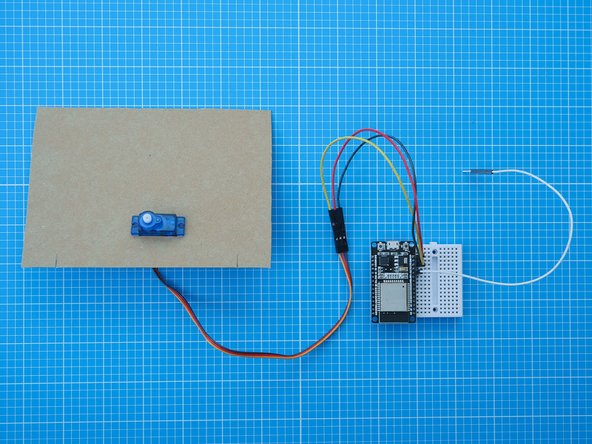
Reconnect the servo motor to the breadboard assembly making sure the leads connect correctly.
-
-
-
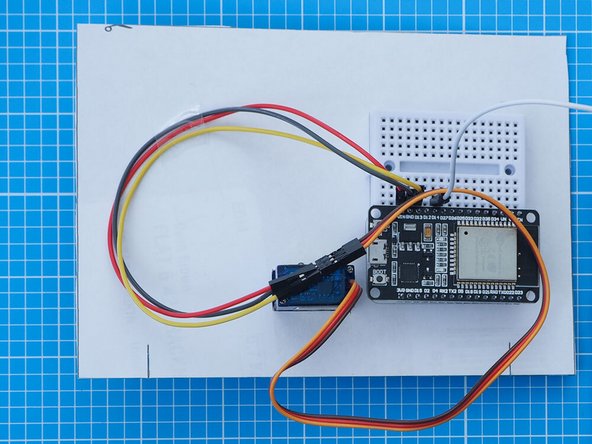
Mount the breadboard assembly onto the back of the mount following the position indicated on the paper template. The breadboard has a double sided tape backing which can be used to attach it.
-
Tape down the coloured servo motor cables, whilst leaving the white capacitive touch cable loose.
-
-
-
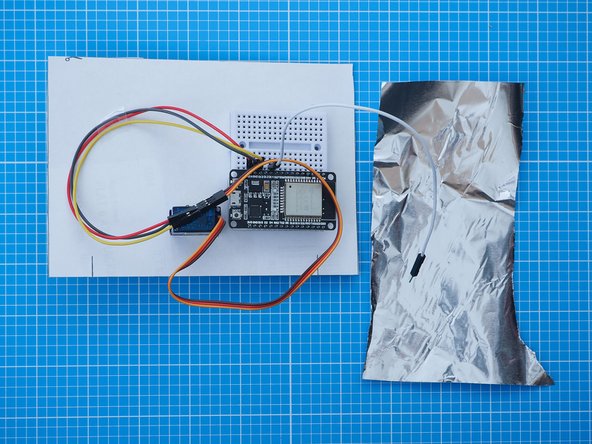
The capacitive touch button is how you operate the Speed Dial Mini device. In this example, we will make the button out of aluminium kitchen foil, but other metallic elements (e.g washers, coins) also work.
-
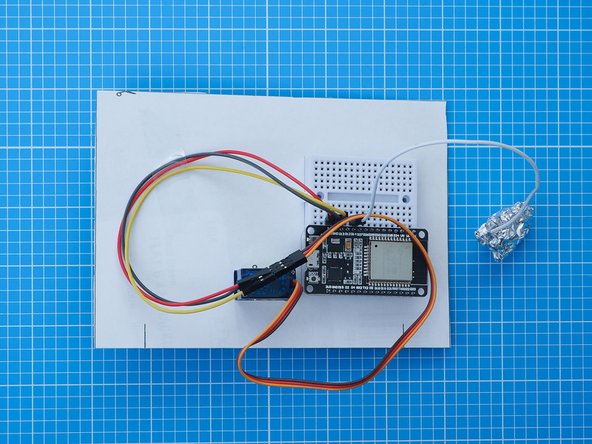
Crumple a sheet of aluminium kitchen foil around the exposed metal on the end of the capacitive touch lead.
-
You can leave the foil button to dangle from the lead or tape it into a position behind the mount.
-
-
-
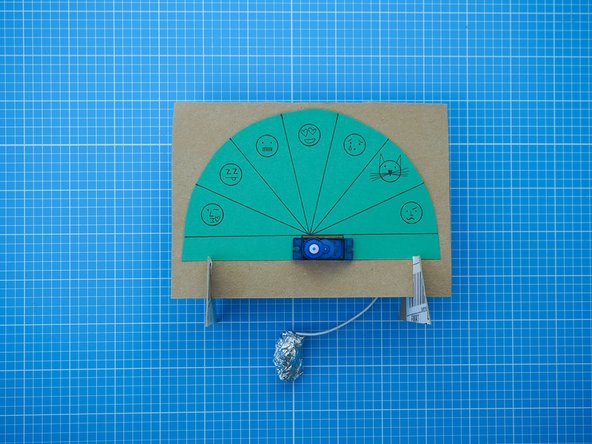
Add the dial to the front of the cardboard mount, clamping it between the servo motor brackets and the mount.
-
Add the two legs by sliding the grooves together. The tops of the legs should further secure the dial in the position.
-
-
-
Measure, cut and decorate your dial pointer.
-
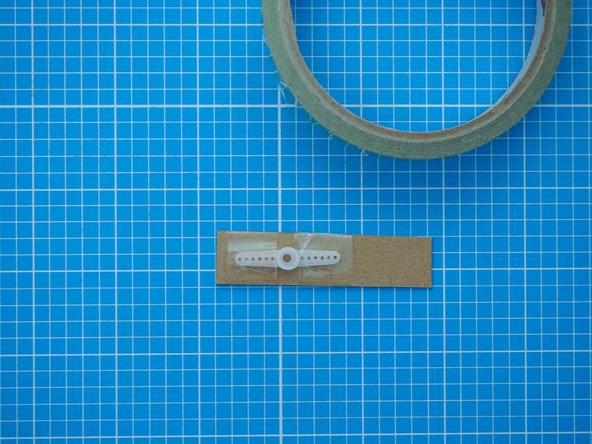
Tape or glue it onto the servo motor arm.
-
There are lots of things you could make your pointer from including cable ties, pencils, twigs, paper, etc. Use your imagination or pick one from the printable template.
-
-
-
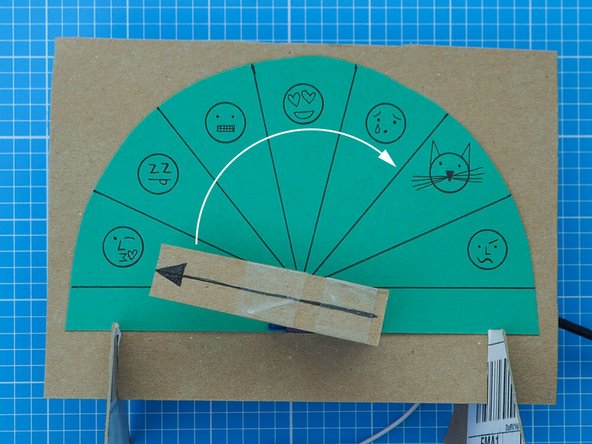
Plug in your Speed Dial device and wait for the servo motor to finish its startup sequence move.
-
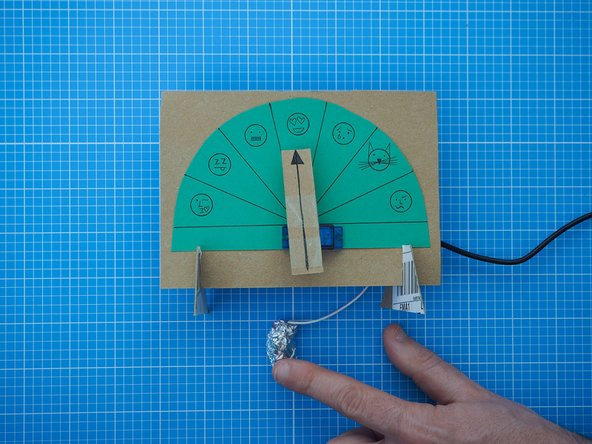
Attach the pointer to the servo motor so that it points at the centre of the left-most segment, as shown.
-
-
-
You can make and pair both Speed Dial devices in the same household and post one to your remote partner. Alternatively, they can be made remotely and paired via the internet.
-
Use the Network Setup guide to pair two Speed Dial devices. We assume you'll do this before you start assembling the electronics, but you can link or re-link them at any time.
-
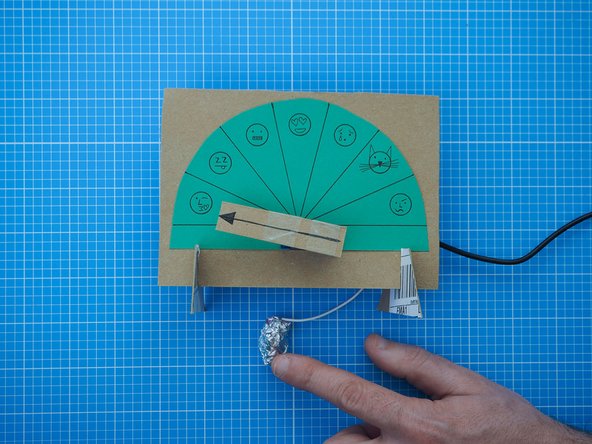
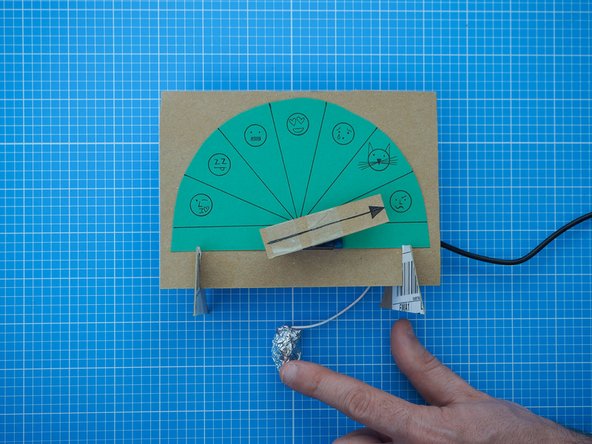
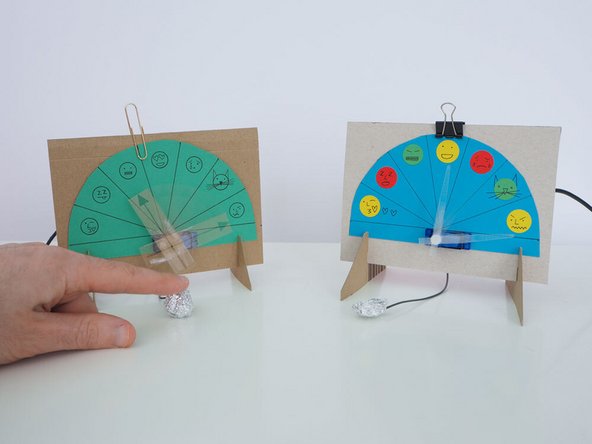
Tap the aluminium foil ball to move the pointer one notch. Your partner's pointer will move to the same position.
-
If you try to move your pointer and it stays in the same position, your partner's device may not be on the network.
-
-
-
The build is finished and ready to use.
-
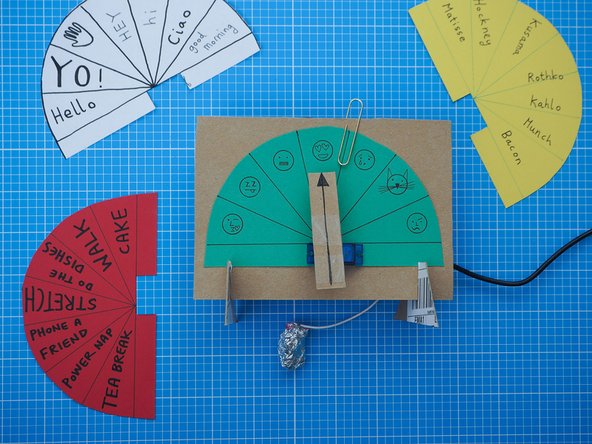
It's easy to swap in and out different dial messages, which can be secured with a paper clip.
-
Speed Dial devices work best when plugged into dedicated adaptors like phone chargers and left on continuously. They do not run well when plugged into laptops or computers as these will struggle to power the servo motors.
-
Enjoy!
-